| Head southeast on Helions Walk | 50 m |
| Turn right onto Duddery Hill | 550 m |
| Continue onto Clements Lane | 500 m |
| Turn left onto Burton End | 1 km |
| Enter the traffic circle and take the 3rd exit onto Haverhill Bypass (A1017) | 55 m |
| Exit the traffic circle onto Haverhill Bypass (A1017) | 2 km |
| Enter the traffic circle and take the 1st exit onto A1307 | 35 m |
| Exit the traffic circle onto A1307 | 3 km |
| Go straight onto Horseheath Bypass (A1307) | 1 km |
| Continue onto Linton Road (A1307) | 2.5 km |
| Continue onto Horseheath Road (A1307) | 1.5 km |
| Enter the traffic circle and take the 2nd exit onto A1307 | 70 m |
| Exit the traffic circle onto A1307 | 7 km |
| Enter Fourwentways and take the 1st exit onto A11 | 15 m |
| Exit the traffic circle onto A11 | 900 m |
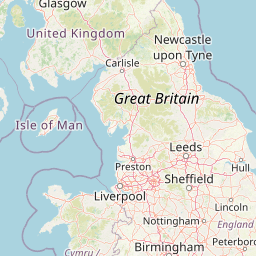
| Keep left onto A505 | 3.5 km |
| Enter the traffic circle and take the 2nd exit onto Causeway (A505) | 80 m |
| Exit the traffic circle onto Causeway (A505) | 2.5 km |
| Enter Hunts Road Roundabout and take the 2nd exit onto Royston Road (A505) | 35 m |
| Exit the traffic circle onto Royston Road (A505) | 400 m |
| Enter Duxford Interchange and take the 2nd exit onto Royston Road (A505) | 150 m |
| Exit the traffic circle onto Royston Road (A505) | 7 km |
| Continue onto Newmarket Road (A505) | 4 km |
| Continue onto Royston Bypass (A505) | 450 m |
| Enter the traffic circle and take the 2nd exit onto Royston Bypass (A505) | 50 m |
| Exit the traffic circle onto Royston Bypass (A505) | 1 km |
| Enter the traffic circle and take the 2nd exit onto Royston Bypass (A505) | 70 m |
| Exit the traffic circle onto Royston Bypass (A505) | 1 km |
| Enter the traffic circle and take the 2nd exit onto Royston Bypass (A505) | 80 m |
| Exit the traffic circle onto Royston Bypass (A505) | 2.5 km |
| Enter the traffic circle and take the 2nd exit onto Baldock Road (A505) | 90 m |
| Exit the traffic circle onto Baldock Road (A505) | 4 km |
| Continue onto Royston Road (A505) | 4.5 km |
| Continue onto Baldock Bypass (A505) | 4.5 km |
| Enter the traffic circle and take the 1st exit onto London Road (A505) | 35 m |
| Exit the traffic circle onto London Road (A505) | 800 m |
| Enter Letchworth Gate and take the 1st exit towards Stevenage | 20 m |
| Exit the traffic circle towards Stevenage | 550 m |
| Merge right onto A1(M) | 25 km |
| Take the ramp on the left towards A414: St Albans | 550 m |
| Enter Roehyde Interchange and take the 2nd exit onto North Orbital Road (A414) | 200 m |
| Exit the traffic circle onto North Orbital Road (A414) | 2 km |
| Keep left onto North Orbital Road (A414) | 2.5 km |
| Enter London Colney Roundabout and take the 2nd exit onto North Orbital Road (A414) | 150 m |
| Exit the traffic circle onto North Orbital Road (A414) | 3 km |
| Enter Park Street Roundabout and take the 2nd exit onto North Orbital Road (A405) | 50 m |
| Exit the traffic circle onto North Orbital Road (A405) | 900 m |
| Enter the traffic circle and take the 2nd exit onto North Orbital Road (A405) | 30 m |
| Exit the traffic circle onto North Orbital Road (A405) | 1 km |
| Enter the traffic circle and take the 1st exit onto North Orbital Road (A405) | 40 m |
| Exit the traffic circle onto North Orbital Road (A405) | 700 m |
| Enter Bricket Wood Junction and take the 3rd exit towards M25: Heathrow | 200 m |
| Exit the traffic circle towards M25: Heathrow | 55 km |
| Take the ramp on the left towards A3: London (SW) | 350 m |
| Enter Wisley Interchange and take the 3rd exit onto A3 | 400 m |
| Exit the traffic circle onto A3 | 900 m |
| Merge right onto Portsmouth Road (A3) | 1 km |
| Continue onto Ripley By-Pass (A3) | 10 km |
| Continue onto Guildford and Godalming Bypass (A3) | 8 km |
| Continue onto Milford By-Pass (A3) | 2 km |
| Continue onto Portsmouth Road (A3) | 5 km |
| Continue onto Tunnel Way (A3) | 5 km |
| Continue onto Portsmouth Road (A3) | 3.5 km |
| Continue onto Liphook and Petersfield Bypass (A3) | 9 km |
| Enter Ham Barn Roundabout and take the 2nd exit onto Liphook and Petersfield Bypass (A3) | 70 m |
| Exit the traffic circle onto Liphook and Petersfield Bypass (A3) | 10 km |
| Continue onto London Road (A3) | 15 km |
| Continue onto A27 | 3.5 km |
| Continue onto M27 | 1 km |
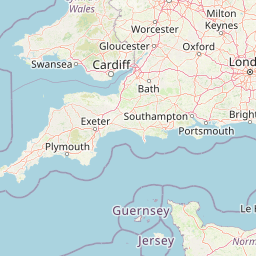
| Take exit 12 on the left towards M275: Portsmouth | 900 m |
| Merge right onto M275 | 2 km |
| Take exit 2 on the left towards Cruise and Cross Channel Ferries | 500 m |
| Enter Rudmore Roundabout and take the 4th exit | 200 m |
| Exit the traffic circle | 60 m |
| Turn left | 55 m |
| Turn right | 25 m |
| Keep right at the fork | 250 m |
| Make a slight left | 350 m |
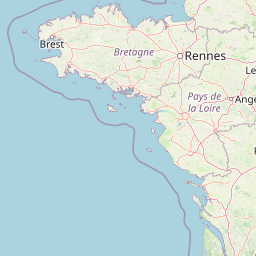
| Take the ferry Portsmouth - Cherbourg | 150 km |
| Continue straight | 100 m |
| Continue slightly left onto Sortie Portuaire | 250 m |
| Keep left onto Sortie Portuaire | 25 m |
| Keep right at the fork | 150 m |
| Go straight onto Sortie Portuaire | 800 m |
| Enter Rond-Point des Mielles and take the 2nd exit | 90 m |
| Exit the traffic circle | 60 m |
| Go straight onto Voie Portuaire | 550 m |
| Enter Rond-Point de la Pyrotechnie and take the 1st exit onto Rue Aristide Briand | 15 m |
| Exit the traffic circle onto Rue Aristide Briand | 700 m |
| Turn left onto Rue Médéric | 200 m |
| Continue onto Rue Gambetta | 400 m |
| Turn right onto Avenue des Prairies | 700 m |
| Enter Rond-Point de Penesme and take the 2nd exit onto Axe Nord-Sud (N 13) | 50 m |
| Exit the traffic circle onto Axe Nord-Sud (N 13) | 4.5 km |
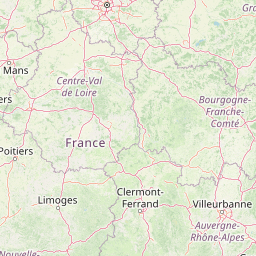
| Enter Rond-Point André Malraux and take the 3rd exit onto N 13 | 150 m |
| Exit the traffic circle onto N 13 | 100 km |
| Continue onto Périphérique Nord (N 814) | 9 km |
| Continue onto Périphérique Nord (N 814) | 1.5 km |
| Take the ramp towards Deauville-Trouville | 450 m |
| Keep left towards A 13: Deauville-Trouville | 200 km |
| Keep right towards Versailles | 15 km |
| Take the ramp towards A 86: Créteil | 200 m |
| Continue straight | 600 m |
| Keep right at the fork | 500 m |
| Merge left onto Duplex A86 (A 86) | 10 km |
| Continue onto N 385 | 5.5 km |
| Continue onto A 86 | 3 km |
| Take the ramp towards A 6 B: Bordeaux | 600 m |
| Merge left onto A 6b | 1.5 km |
| Take the ramp on the left towards A 6: Évry | 600 m |
| Merge left onto Autoroute du Soleil (A 6) | 15 km |
| Keep left onto Autoroute du Soleil (A 6) | 10 km |
| Keep left onto Autoroute du Soleil (A 6) | 9 km |
| Keep left onto Autoroute du Soleil (A 6) | 35 km |
| Keep left towards A 6: Lyon | 200 km |
| Take the ramp towards E 60: Besancon | 2.5 km |
| Merge left onto Autoroute de Lorraine-Bourgogne (A 31) | 2.5 km |
| Keep right towards A 36: Mulhouse | 150 km |
| Keep left towards A 36: Strasbourg | 60 km |
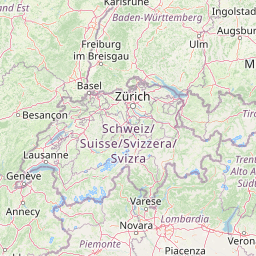
| Take the ramp towards A 35: Basel | 1 km |
| Merge right onto Autoroute des Cigognes (A 35) | 25 km |
| Turn right | 150 m |
| Merge left onto Autoroute des Cigognes (A 35) | 150 m |
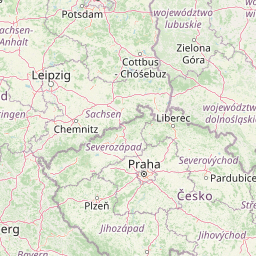
| Continue onto A3 | 15 km |
| Keep left towards Zürich Baden | 50 km |
| Keep left towards A1 | 15 km |
| Take the ramp towards Sankt Gallen | 90 m |
| Keep left towards Sankt Gallen | 400 m |
| Continue onto A1 | 10 km |
| Take the ramp towards Zürich-City | 700 m |
| Merge left towards Sankt Gallen | 450 m |
| Keep left towards Sankt Gallen | 30 km |
| Keep left onto A1 | 55 km |
| Keep left towards E 60: Chur | 30 km |
| Take the ramp towards Kriessern | 300 m |
| Keep left onto Südstrasse | 100 m |
| Continue onto Schweizerstraße | 700 m |
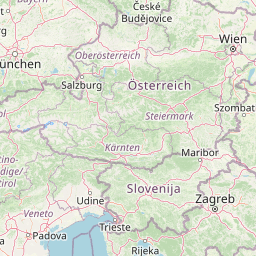
| Enter Schweizerstraße and take the 3rd exit towards A14: Innsbruck | 45 m |
| Exit the traffic circle towards A14: Innsbruck | 900 m |
| Continue onto Alte Landstraße (L58) | 200 m |
| Enter the traffic circle and take the 3rd exit towards Innsbruck | 40 m |
| Exit the traffic circle towards Innsbruck | 350 m |
| Continue onto Schweizerstraße (L55) | 450 m |
| Turn right onto Götznerstraße (L56) | 450 m |
| Turn right onto Feldkircherstraße (L56) | 300 m |
| Continue onto Lastenstraße (L56) | 400 m |
| Turn left onto Appenzeller Straße (L58) | 600 m |
| Turn right onto Feldgasse | 250 m |
| Turn left onto Bahnhofstraße | 400 m |
| Turn right onto Hauptstraße (L190) | 3 m |
| You have arrived at your destination, on the left | 0 m |