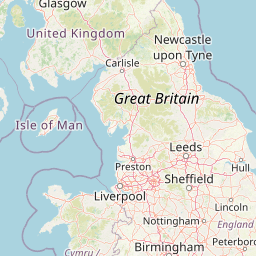
| Head southwest on Ramshill Road | 550 m |
| Continue onto Filey Road (A165) | 200 m |
| Turn right onto Queen Margaret's Road (B1427) | 1.5 km |
| Make a slight left to stay on Queen Margaret's Road (B1427) | 60 m |
| Merge right onto Seamer Road (A64) | 2 km |
| Enter the traffic circle and take the 2nd exit onto Seamer By Pass (A64) | 90 m |
| Exit the traffic circle onto Seamer By Pass (A64) | 1 km |
| Enter Seamer By Pass and take the 2nd exit onto A64 | 35 m |
| Exit the traffic circle onto A64 | 2 km |
| Enter the traffic circle and take the 1st exit onto A64 | 15 m |
| Exit the traffic circle onto A64 | 2.5 km |
| Enter Staxton Roundabout and take the 2nd exit onto Main Street (A64) | 55 m |
| Exit the traffic circle onto Main Street (A64) | 350 m |
| Continue onto Malton Road (A64) | 700 m |
| Turn left onto Beverley Gate (B1249) | 800 m |
| Continue onto Staxton Hill (B1249) | 9 km |
| Enter the traffic circle and take the 2nd exit onto Scarborough Road (B1249) | 25 m |
| Exit the traffic circle onto Scarborough Road (B1249) | 2.5 km |
| Continue onto Front Street (B1249) | 350 m |
| Continue onto Driffield Road (B1249) | 2.5 km |
| Go straight onto Scarborough Road (B1249) | 5.5 km |
| Enter the traffic circle and take the 3rd exit onto Driffield Bypass (A614) | 150 m |
| Exit the traffic circle onto Driffield Bypass (A614) | 1 km |
| Enter the traffic circle and take the 2nd exit onto Driffield Bypass (A614) | 90 m |
| Exit the traffic circle onto Driffield Bypass (A614) | 1.5 km |
| Enter Kelleythorpe Roundabout and take the 2nd exit onto Main Street (A614) | 70 m |
| Exit the traffic circle onto Main Street (A614) | 6 km |
| Enter the traffic circle and take the 1st exit onto Main Street (A614) | 40 m |
| Exit the traffic circle onto Main Street (A614) | 1.5 km |
| Continue onto Middleton Road (A614) | 3 km |
| Continue slightly left onto Front Street (A614) | 10 km |
| Enter the traffic circle and take the 2nd exit onto Towthorpe Lane (A614) | 50 m |
| Exit the traffic circle onto Towthorpe Lane (A614) | 2 km |
| Enter the traffic circle and take the 2nd exit onto A614 | 50 m |
| Exit the traffic circle onto A614 | 4 km |
| Enter the traffic circle and take the 2nd exit onto Market Weighton Road (A614) | 60 m |
| Exit the traffic circle onto Market Weighton Road (A614) | 2.5 km |
| Continue onto New Road (A614) | 300 m |
| Continue left onto Moor End (A614) | 10 km |
| Enter the traffic circle and take the 2nd exit onto Boothferry Road (A614) | 80 m |
| Exit the traffic circle onto Boothferry Road (A614) | 1 km |
| Enter the traffic circle and take the 2nd exit onto Boothferry Road (A614) | 20 m |
| Exit the traffic circle onto Boothferry Road (A614) | 800 m |
| Enter the traffic circle and take the 1st exit onto A614 | 6 m |
| Exit the traffic circle onto A614 | 800 m |
| Take the ramp on the left | 350 m |
| Merge right onto M62 | 8 km |
| Take the ramp on the left onto M18 | 30 km |
| Take the ramp on the left towards A1(M) | 600 m |
| Enter Wadworth Interchange and take the 1st exit towards A1(M): The SOUTH | 35 m |
| Exit the traffic circle towards A1(M): The SOUTH | 450 m |
| Merge right onto Doncaster By-pass (A1(M)) | 20 km |
| Continue onto Worksop Road (A1) | 5 km |
| Continue onto Twyford Lane (A1) | 35 km |
| Continue onto Long Bennington Bypass (A1) | 4 km |
| Continue onto Foston Bypass (A1) | 1.5 km |
| Continue onto Great North Road (A1) | 55 km |
| Continue onto Water Newton Bypass (A1) | 800 m |
| Continue onto Great North Road (A1) | 20 km |
| Keep right onto A1(M) | 7 km |
| Take the ramp on the left onto A14 | 25 km |
| Keep right onto Huntingdon Road (A14) | 550 m |
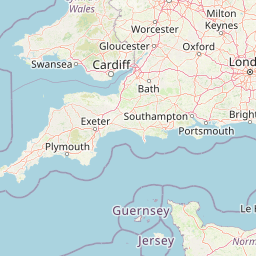
| Continue onto M11 | 70 km |
| Take the ramp on the left towards M25 | 400 m |
| Keep left towards M25: (M20 | 450 m |
| Keep right towards M25: (M20 | 250 m |
| Merge right onto M25 | 10 km |
| Keep right onto M25 | 15 km |
| Continue towards M25: (M20 | 8 km |
| Take the ramp on the left towards A2: (M2) Canterbury | 1.5 km |
| Merge right onto Dartford Bypass (A2) | 3 km |
| Continue onto Watling Street (A2) | 10 km |
| Continue onto M2 | 9 km |
| Take the ramp on the left onto M2 | 600 m |
| Enter Taddington Roundabout and take the 3rd exit onto A229 | 250 m |
| Exit the traffic circle onto A229 | 350 m |
| Enter Lord Lees Roundabout and take the 1st exit | 5 m |
| Exit the traffic circle | 300 m |
| Continue onto A229 | 3 km |
| Take the ramp on the left | 500 m |
| Keep right at the fork | 100 m |
| Enter Cobtree Roundabout and take the 1st exit towards Ashford | 8 m |
| Exit the traffic circle towards Ashford | 50 km |
| Take the ramp on the left towards Channel Tunnel | 400 m |
| Keep right at the fork | 1.5 km |
| Go straight onto FlexiPlus | 250 m |
| Continue onto Boulevard d'Erlanger | 800 m |
| Keep right at the fork | 15 m |
| Keep right at the fork | 900 m |
| Continue onto Over Bridge 2 | 200 m |
| Turn left | 90 m |
| Make a slight right | 20 m |
| Take the ferry Le Shuttle | 60 km |
| Make a slight right | 150 m |
| Turn right | 1 km |
| Keep right towards Calais Centre | 1 km |
| Enter Giratoire du Chantier du Siècle and take the 1st exit onto Boulevard de l'Europe | 25 m |
| Exit the traffic circle onto Boulevard de l'Europe | 900 m |
| Enter Giratoire de l'Europe and take the 2nd exit towards A 16 | 100 m |
| Exit the traffic circle towards A 16 | 200 m |
| Enter the traffic circle and take the 1st exit towards Dunkerque | 30 m |
| Exit the traffic circle towards Dunkerque | 400 m |
| Merge left onto L'Européenne (A 16) | 45 km |
| Keep left towards Ostende | 10 km |
| Continue onto E40 | 90 km |
| Take the ramp towards E17: Kortrijk | 350 m |
| Keep left towards E17: Antwerpen | 1.5 km |
| Keep left onto E17 | 200 m |
| Keep right towards Antwerpen | 30 km |
| Take the ramp towards N16: Sint-Niklaas | 600 m |
| Keep left towards N16: Sint-Niklaas | 2 km |
| Keep left at the fork | 500 m |
| Keep left at the fork | 800 m |
| Merge left onto E17 | 15 km |
| Merge left onto R1 | 8 km |
| Take the ramp towards Luik | 550 m |
| Merge left onto Koning Boudewijnsnelweg (E34) | 9 km |
| Keep right onto E34 | 50 km |
| Continue onto De Vroent (A67) | 5.5 km |
| Take exit 29 towards N284: Hapert | 4 km |
| Take exit 30 towards N397: Eersel | 15 km |
| Keep right towards A67: Duisburg | 25 km |
| Take exit 37 towards Liessel | 70 km |
| Take the ramp towards A 3 | 900 m |
| Merge left onto A 3 | 10 km |
| Continue towards A 2: Hannover | 60 km |
| Take the ramp towards A 1: Bremen | 200 m |
| Keep right towards A 1: Köln | 550 m |
| Merge left onto A 1 | 8 km |
| Take the ramp towards A 44: Kassel | 350 m |
| Keep left towards A 44: Kassel | 450 m |
| Keep left towards A 1: Köln | 400 m |
| Keep right towards A 44: Kassel | 400 m |
| Keep left towards A 44: Kassel | 150 m |
| Merge left onto A 44 | 45 km |
| Take the ramp towards B 55: Erwitte | 200 m |
| Keep left towards B 55: Erwitte | 500 m |
| Keep left towards A 44: Kassel | 500 m |
| Merge left towards A 44: Kassel | 25 km |
| Take exit 61 towards A 33: Bielefeld | 150 m |
| Keep left towards A 33: Bielefeld | 350 m |
| Keep left towards A 44: Kassel | 400 m |
| Merge left towards A 44: Kassel | 70 km |
| Keep left towards A 49: Kassel-Zentrum | 1 km |
| Merge left onto A 49 | 7 km |
| Take the ramp towards A 7: Hannover | 800 m |
| Merge left towards Hamburg | 35 km |
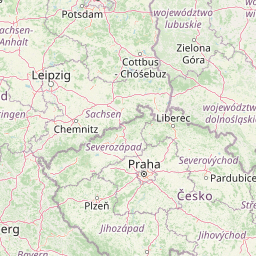
| Take the ramp towards A 38: Leipzig | 300 m |
| Merge left onto A 38 | 200 km |
| Take the ramp towards B 2: Leipzig-Süd | 700 m |
| Keep left towards A 38: Dresden | 550 m |
| Merge left towards Dresden | 15 km |
| Take the ramp towards A 14: Dresden | 800 m |
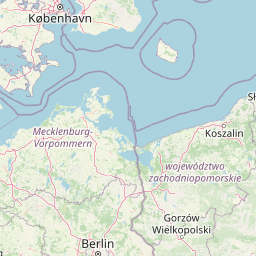
| Merge left onto A 14 | 60 km |
| Continue onto A 14 | 9 km |
| Merge left towards Görlitz | 15 km |
| Take the ramp towards A 17: Prag/Praha | 450 m |
| Continue onto A 17 | 45 km |
| Continue onto 🇨🇿 (D8) | 25 km |
| Take the ramp towards 613: Ústí nad Labem-centrum | 200 m |
| Enter the traffic circle and take the 1st exit onto 613 | 9 m |
| Exit the traffic circle onto 613 | 400 m |
| Enter the traffic circle and take the 2nd exit onto 613 | 70 m |
| Exit the traffic circle onto 613 | 3.5 km |
| Enter the traffic circle and take the 2nd exit onto Bílinská | 100 m |
| Exit the traffic circle onto Bílinská | 60 m |
| Turn right | 30 m |
| Keep left onto Malá hradební | 80 m |
| You have arrived at your destination | 0 m |